
Updated: November 15, 2025
When I first drove my Land Cruiser into Morocco’s Sahara, I thought years of off-roading back home prepared me. I was wrong. The Moroccan desert demands a different kind of respect, a specific skillset, and equipment most tourists never consider. This isn’t Merzouga’s tourist circuit where guides do the hard work. This is autonomous 4×4 desert driving in Morocco where you’re entirely on your own.
After three expeditions across Morocco’s most challenging terrain, countless hours stuck in sand, and conversations with Berber guides who’ve spent their lives navigating these dunes, I’ve learned what actually works. This guide cuts through the romantic fantasies and tells you exactly what you need to know.
The Moroccan Sahara is unforgiving. GPS fails. Cell service vanishes for days. One wrong turn on unmarked tracks can leave you circling the same dune field until your water runs out. But with proper preparation, the right vehicle, and techniques refined over decades by locals, independent desert driving in Morocco is absolutely possible.
This guide is built on four pillars that separate successful desert crossings from expensive rescue operations: the vehicle, the terrain mastery, the tire obsession, and survival navigation. Miss any one of these, and you’re gambling with your safety. Let’s get into the details that actually matter when you’re 200 kilometers from the nearest paved road.
The Foundation: Choosing Your 4×4 for Morocco’s Desert
Here’s what nobody tells you about renting a 4×4 for the Sahara in Morocco: most vehicles marketed as “4×4” are actually SUVs that will get you stuck within an hour of leaving paved roads. I learned this the hard way watching a Dacia Duster spin its wheels helplessly on what locals call “easy sand.”
The difference between a real 4×4 and an SUV isn’t just marketing. It’s fundamental engineering that determines whether you drive through challenging terrain or spend six hours digging yourself out while the sun hammers down at 45°C.
 A real 4×4 has three characteristics you can verify before signing any rental agreement. First, separate chassis and body construction, not the unibody design of most SUVs. You should see a distinct frame underneath when you look at the vehicle from the side. Second, a low-range transfer case with a dedicated lever you physically move, not just a “4WD” button on the dashboard. Third, locking differentials or at least limited-slip differentials that you can engage manually.
If the rental agent can’t explain these features or show you how they work, walk away. You’re about to pay premium prices for a vehicle that will fail you when it matters most. I’ve seen too many tourists stuck in the Zagora region because they rented what looked like a 4×4 but was really just an all-wheel-drive crossover with no low range and open differentials.
The Big Three: Vehicles That Actually Work
I’ve seen dozens of vehicle types attempt Morocco’s desert routes over the past few years. Only three consistently succeed, and locals will confirm this if you ask them honestly. Everything else is either too fragile, too complicated, or simply not designed for sustained desert driving.
Toyota Land Cruiser (70, 80, or 100 Series)
The undisputed king of Sahara crossings. Every Berber guide I met drives one, and there’s a reason that transcends brand loyalty. Parts are available in every town, mechanics know these engines blindfolded, and they simply don’t quit. The 70 Series with its utilitarian design is preferred by locals, but the 80 and 100 Series offer more comfort for long expeditions without sacrificing capability.
I’ve driven all three series extensively. The 70 feels agricultural but survives abuse that would kill other vehicles. The 80 Series strikes the best balance between comfort and capability for most travelers. The 100 Series offers the most comfort but drinks fuel faster, which matters when gas stations are 400 kilometers apart.
Rental price ranges from $120-180 per day depending on condition and modifications. Best 4×4 for Moroccan dunes? The Land Cruiser wins every time.
Land Rover Defender (90 or 110)
Better off-road capability than the Cruiser in pure technical terrain, but maintenance can be problematic outside major cities. If you’re tackling routes like the ancient caravan trails to Erg Chigaga, the Defender’s shorter wheelbase (especially the 90) gives you advantages on tight switchbacks and steep dune faces.
The challenge? Finding one properly maintained and getting parts if something breaks. I met a German couple who spent four days in Zagora waiting for a transfer case seal. Not ideal when you’re on a schedule.
Rental price: $100-150/day, though finding rentals is harder than with the Toyota.
Jeep Wrangler (Rubicon or Sahara)
The dark horse candidate that surprises people. Modern Wranglers, especially Rubicons with their electronic locking differentials and disconnecting sway bars, handle Moroccan sand beautifully. The downside is availability and the fact that most Moroccan mechanics have limited experience with them.
I’d only recommend a Wrangler if you’re sticking to more established routes where help is reachable within a day’s drive. For deep desert expeditions, stick with the Toyota.
Rental price: $90-140/day where available.
Essential Modifications: What You Actually Need
The rental companies will try to upsell you on every modification imaginable. Most are unnecessary. Some are critical. Here’s what actually matters based on the routes you’re planning.
Snorkel (Air Intake Extension)
Only necessary if you’re crossing oueds (dry riverbeds) that might have water, or if you’re driving in dusty conditions for extended periods. For pure sand driving, skip it. I’ve crossed the Sahara three times without one. The rental companies love to charge $20/day extra for this, but unless you’re planning water crossings, it’s theater.
Underbody Protection (Skid Plates)
Absolutely mandatory. The desert looks smooth from a distance but is littered with rocks that will puncture your oil pan, crack your differential housing, or damage your transfer case. I watched a Range Rover end its journey permanently after hitting a hidden rock at 40 km/h without proper protection.
Verify that the rental vehicle has skid plates covering at minimum: oil pan, transfer case, and fuel tank. If it doesn’t, find another rental company.
Additional Fuel Capacity
Most desert-spec rentals come with at least one jerry can (20 liters). For routes longer than 500 kilometers between fuel stations, you’ll want two. Calculate your fuel consumption at 15-18 liters per 100km in sand (almost double your highway consumption) and plan accordingly.
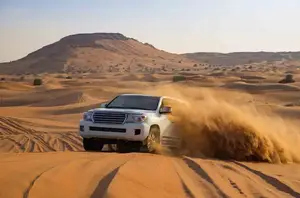
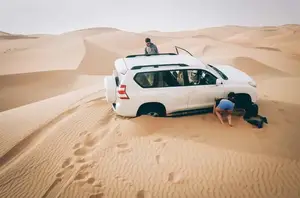 Even experienced drivers get stuck in soft Sahara sand[/caption]
Mastering the Terrain: Sand Driving and Unmarked Tracks
This is where theory meets reality, where confident drivers become humble students, and where respect for the desert becomes personal. Desert driving in Morocco isn’t just about having a 4×4. It’s about reading terrain, understanding sand behavior, and knowing your vehicle’s limits before you exceed them.
I’ve trained with rally drivers, watched local guides navigate impossible-looking dunes, and spent more hours than I care to admit digging out from mistakes. What follows are the techniques that actually work, stripped of the ego and romanticism that gets people into trouble.
The Physics of Sand: What You’re Actually Driving On
Sand behaves nothing like dirt, mud, or gravel. It’s a fluid medium that shifts constantly, offers almost no lateral support, and punishes momentum changes. Understanding this changes everything about how you drive.
When your tire touches sand, it sinks until it reaches a compression point where the sand density can support your vehicle’s weight. The deeper your tire sinks, the more surface area needs to plow forward, which increases resistance exponentially. This is why tire pressure matters so much (we’ll cover this extensively in the next section).
Sand also has “memory.” Drive over the same section twice in the same day, and it’s softer the second time because you’ve already disturbed its structure. This is why following existing tracks isn’t always the best strategy, especially if those tracks are fresh.
The Golden Rule: Momentum Management
In sand, momentum is everything. But here’s the catch that trips up experienced off-roaders: it’s not about raw speed. It’s about maintaining constant, smooth momentum without sudden changes.
The technique: Build speed on firm ground before entering soft sand (usually 40-60 km/h depending on conditions). Maintain that speed with steady throttle input. Don’t accelerate hard in the middle of a sand section. Don’t brake unless absolutely necessary. If you feel the vehicle slowing despite steady throttle, gently add power. If you feel it starting to slide sideways, ease off slightly but never lift completely.
The moment you stop in soft sand, you’re stuck. Period. Getting unstuck requires more energy than maintaining momentum would have. I’ve seen drivers stop on a dune face to take photos only to spend two hours recovering their vehicle.
Climbing Dunes: The Technique Nobody Teaches Properly
Approaching a dune, especially a large one, triggers anxiety even in experienced drivers. Your instinct is to charge it aggressively. Wrong. Here’s what actually works.
First, never attempt a dune climb without first walking to the top to verify what’s on the other side. I’ve watched vehicles crest a dune at speed only to discover a sheer drop on the other side. One Land Cruiser I saw did this near Erg Chebbi and rolled twice. Everyone survived, but the vehicle was totaled.
For the actual climb: Approach at a 45-degree angle if possible, not straight on. This gives you more surface area for your tires to bite and provides an escape route if you start losing momentum. Build speed on the approach but not so much that you catch air at the crest.
As you climb, keep steady throttle. The critical moment is the last third of the ascent where the grade steepens. This is where most people either accelerate too aggressively (causing wheel spin) or lift off (losing momentum). Stay smooth.
If you feel momentum dropping despite steady throttle, you have two choices: commit and add more power, or abort by turning downhill immediately. The worst thing you can do is hesitate halfway up. You’ll stop, sink, and slide backward into a recovery situation that could take hours.
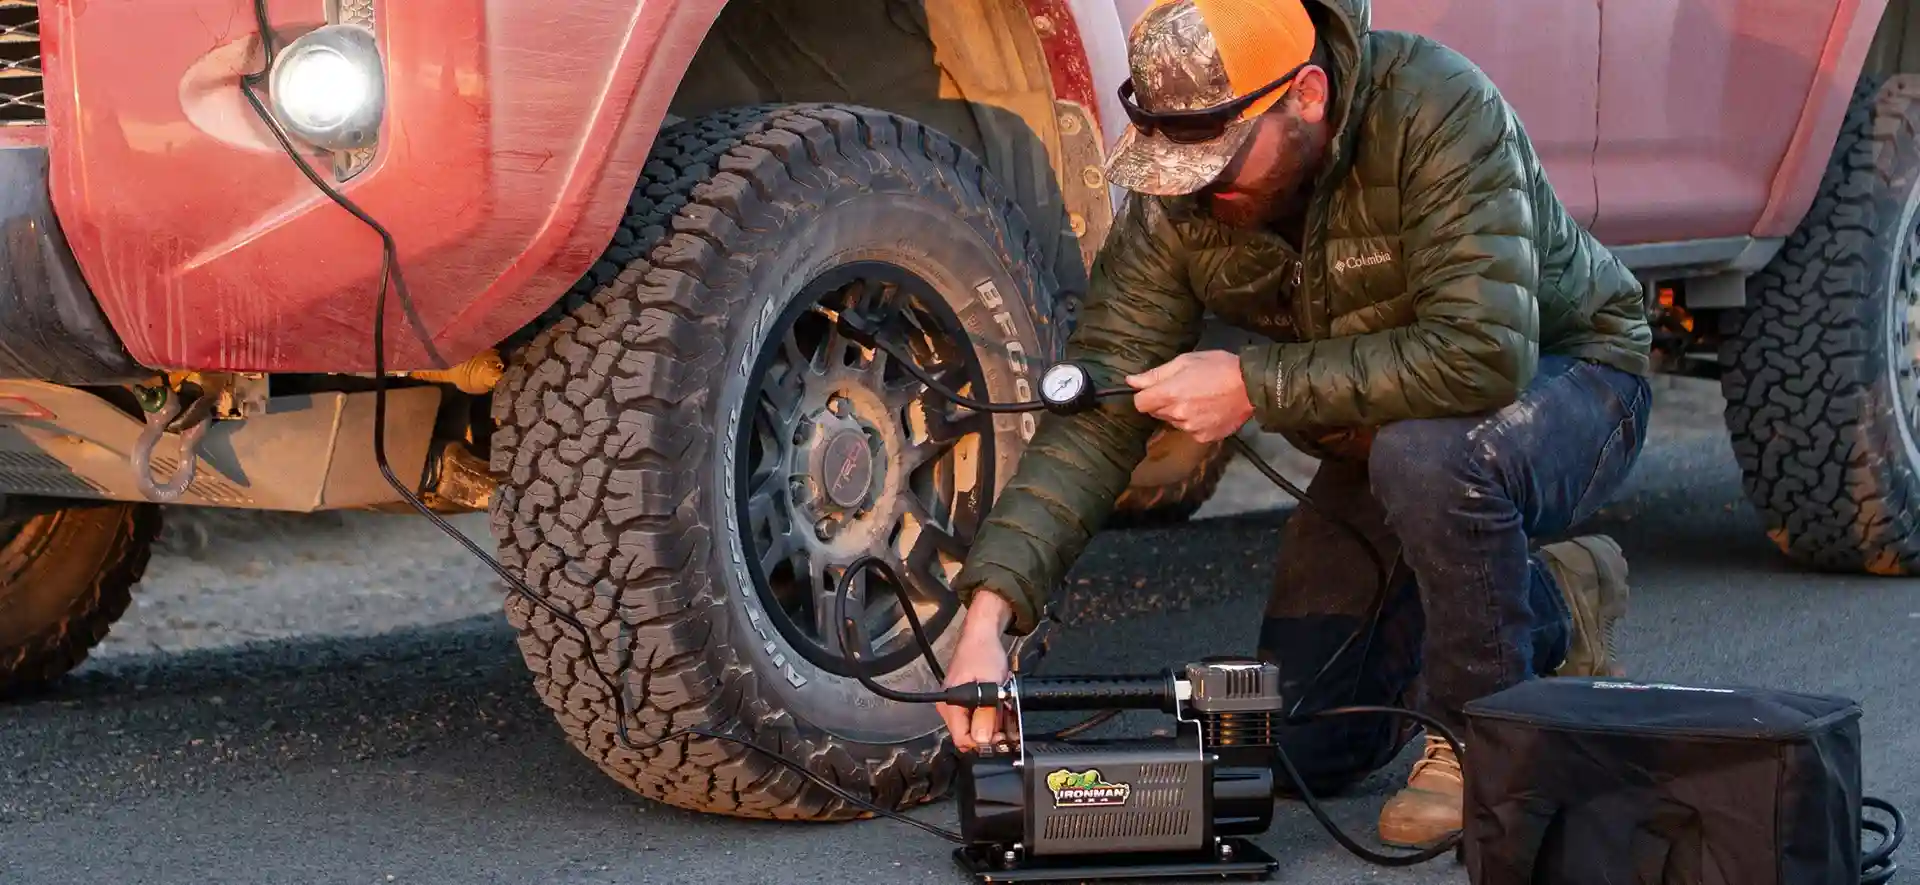
The Tire Obsession: Pressure, Maintenance, and Survival
If there’s one thing that separates tourists who struggle from desert veterans who glide across sand, it’s this: understanding tire pressure. Not just knowing you should lower it, but understanding exactly when, by how much, and having the equipment to manage it properly.
This section alone will save you more time and frustration than anything else in this guide. I’ve watched people spend entire days struggling on sand at 2.5 bar when dropping to 1.2 bar would have made their route effortless.
The Physics: Why Tire Pressure Is Everything
Your tire has a fixed amount of air inside. At high pressure (like the 2.5 bar recommended for highway driving), that air maintains tire shape with minimal ground contact. This is perfect for pavement where you want low rolling resistance and responsive handling.
But in sand, you need the opposite. You want maximum ground contact to distribute your vehicle’s weight over the largest possible area. Think of it like snowshoes. You’re trying to “float” on the sand rather than sink into it.
By reducing tire pressure, you let the tire flatten and spread out, increasing your contact patch sometimes by 200-300%. This dramatically reduces how much each square centimeter of tire is pushing down on the sand, which means you sink less and move forward more easily.
The trade-off is that lower pressure makes the tire more vulnerable to damage from sharp objects and generates more heat at higher speeds. This is why you need to adjust pressure for conditions, not just set it once and forget it.
The Essential Numbers: What Pressure for What Conditions
These are starting points based on a full-size 4×4 (Land Cruiser, Defender, etc.) with standard all-terrain tires. You’ll need to adjust based on your specific vehicle weight and tire size, but these work for 90% of situations.
Highway/Paved Roads: 2.3-2.5 bar (33-36 PSI)
Standard operating pressure. Use this for all paved roads and firm gravel tracks. Never exceed manufacturer recommendations, usually found on a sticker inside the driver’s door.
Firm Gravel Pistes: 2.0-2.2 bar (29-32 PSI)
Slightly reduced for rough gravel roads common throughout Morocco’s interior. Gives you a more comfortable ride and better traction without risking tire damage.
Soft Gravel/Loose Dirt: 1.6-1.8 bar (23-26 PSI)
For degraded tracks where you’re starting to feel the vehicle labor. Common on approaches to remote villages or abandoned pistes.
Moderate Sand: 1.2-1.4 bar (17-20 PSI)
Your go-to pressure for most desert driving. Works for the approaches to major ergs, crossing between dune systems, and most tourist routes to places like Merzouga.
Deep, Soft Sand: 0.8-1.0 bar (12-15 PSI)
For serious dune fields and the softest conditions. I’ve gone this low in the western Sahara near the Algerian border and in parts of Erg Chigaga after windstorms. At this pressure, your tires look disturbingly flat. That’s normal. Drive carefully and don’t exceed 30 km/h.
Emergency/Extreme Conditions: 0.6-0.7 bar (9-10 PSI)
This is your “get unstuck” pressure, not your driving pressure. At this level, you risk the tire coming off the bead (separating from the rim) if you turn too sharply. Use it only for short distances to get out of seriously problematic situations, then air back up.
 A reliable, accurate gauge is mandatory. The pencil-style gauges are compact but I’ve found them unreliable in heat. Get a good digital gauge (I use a Longacre RacePro) that reads in both bar and PSI. Cost: $30-50. Worth every dirham.
Navigation and Survival: GPS Fails, Water Doesn’t
This is the section that could save your life. Everything else in this guide is about making your journey successful and enjoyable. This section is about making sure you survive if things go wrong.
The Moroccan Sahara is less forgiving than you think. People die out here, mostly from dehydration, occasionally from exposure, sometimes from getting lost and running out of supplies while searching for their route. These deaths are usually tourists who underestimated the desert and overestimated their technology.
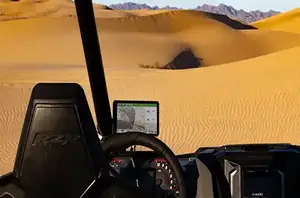
The GPS Myth: Why Technology Fails
Let me be direct about something that surprises people: Standard GPS navigation is nearly useless for serious desert driving in Morocco. Here’s why:
No Cell Service
The moment you leave main tourist areas, cell service vanishes. It’s not “weak” or “spotty.” It’s gone. The nearest tower might be 200 kilometers away. Your smartphone’s GPS will still show your position (GPS is satellite-based, not cellular), but all the mapping features that require data connection stop working.
Apps like Google Maps that require constant internet connectivity become expensive paperweights. You need offline maps, downloaded before you leave civilization.
Terrible Maps
Even offline mapping apps have a fundamental problem in the desert: their maps are terrible. The “roads” shown on most mapping apps don’t exist, were abandoned decades ago, or lead to dead ends. I’ve followed three different “routes” suggested by mapping software that turned out to be dry riverbeds impossible to drive.
The Moroccan desert changes constantly. Wind reshapes dunes. Floods (yes, floods in the desert) wash out tracks. What was passable last year might be impossible this year. The mapping companies don’t update their data to reflect this.
Battery Life in Heat
Smartphones and tablets overheat in direct desert sun. I’ve had an iPhone shut down from heat at 11 AM when it was sitting in my cupholder. Even dedicated GPS units struggle when dashboard temperatures exceed 60°C (140°F), which happens regularly.
Your device’s battery also drains faster in extreme heat, sometimes 2-3 times faster than normal. Plan on your phone having maybe 4-5 hours of active GPS use before dying, even if it’s fully charged to start.
 Sunset in the Sahara after a successful navigation day[/caption]
Practical Considerations: Routes, Timing, and Reality Checks
Theory and technique are essential, but practical planning turns them into successful journeys. This section covers the questions I get most often from people planning their first serious desert driving Morocco expedition.
Recommended Routes for Different Experience Levels
Beginner: Marrakech to Merzouga via Tizi n’Tichka
This is the classic route for first-timers wanting to rent a 4×4 for Merzouga. Total distance: approximately 560km. Time required: 2-3 days minimum with stops.
The route crosses the High Atlas via Tizi n’Tichka pass (2,260m elevation), stops at Aït Benhaddou (UNESCO kasbah), passes through Ouarzazate and the Dadès Valley, and terminates at the Erg Chebbi dunes near Merzouga. About 90% paved roads, 10% gravel tracks.
This route gives you a taste of Morocco 4×4 driving without serious technical challenges. The approach to the dunes near Merzouga involves some sand driving but nothing extreme. Perfect for building confidence.
For detailed logistics, check our complete Morocco road trip planning guide.
Intermediate: Merzouga to Erg Chigaga via Foum Zguid
This route connects two major erg systems and gives you genuine desert driving. Distance: approximately 350km of mostly unpaved tracks. Time: 2-3 days, longer if you explore side routes.
The terrain varies from gravel pistes to sand tracks to proper dune fields. You’ll need to manage tire pressure throughout, navigate using GPS tracks, and be completely self-sufficient for water and fuel. Cell service is intermittent to non-existent.
This is where you learn whether desert driving is truly for you. The landscape is spectacular but demands respect.
Advanced: Western Sahara Circuits
For experienced drivers only. Routes near the Algerian border, through the western ergs, and along ancient caravan trails require complete self-sufficiency, excellent navigation skills, and ideally multiple vehicles traveling together.
These routes are beyond the scope of this guide because if you’re ready for them, you already know how to find information from specialized sources. I mention them only so beginners know they exist and shouldn’t attempt them without significant experience.
Best Times for Desert Driving
Morocco’s desert is accessible year-round but conditions vary dramatically by season.
October through April: Ideal Conditions
Daytime temperatures range from 20-28°C (68-82°F), perfect for active driving and recovery work. Nights can be cold (5-15°C / 41-59°F), so bring layers. This is peak tourist season, especially December-February, so popular areas will be busier.
November through March is my favorite window. Comfortable temperatures, fewer tourists than peak season, and the light is spectacular for photography.
May through September: Extreme Heat
Avoid if possible. Summer temperatures regularly exceed 45°C (113°F) and can reach 50°C (122°F) in July-August. At these temperatures, physical work like recovering from being stuck becomes genuinely dangerous. Water consumption doubles. Vehicle cooling systems struggle.
If you must travel in summer, drive early morning (5 AM – 11 AM) and late afternoon (5 PM – sunset), resting during the brutal midday hours. Increase your water reserves significantly.
For comprehensive seasonal planning, see our guide to driving in Morocco year-round.
Costs and Budgeting
A realistic budget for a 7-10 day desert expedition for two people:
| Expense Category | Cost Range | Notes |
|---|---|---|
| 4×4 Rental | $1,200-1,800 | $120-180/day × 10 days |
| Fuel | $450-550 | 15-18L/100km, 2,000km total @ $1.50/L |
| Accommodation | $150-300 | Mix camping (free) + auberges ($30-60/night) |
| Food | $200-300 | Self-cooking mostly, occasional restaurant |
| Equipment | $300-800 | Compressor, recovery boards (one-time investment) |
| Insurance | Included | Full coverage mandatory, usually in rental |
Total: $2,300-3,750 for a serious 10-day expedition
Budget trips are possible with cheaper rentals and more camping, luxury is possible with premium rentals and bivouac camps. This represents a middle-ground expedition.
Car Rental Specifics for Morocco Desert Driving
Not all rental companies are equal when it comes to 4×4 rental for Sahara Morocco. Look for companies that specialize in off-road vehicles (not general tourist rentals), provide proper 4x4s (Land Cruiser, Defender), not SUVs marketed as 4x4s, include comprehensive insurance covering off-road driving (many don’t), provide emergency equipment as standard (recovery boards, compressor, etc.), and have 24/7 emergency contact and road assistance.
Recommended companies I’ve used or that come highly recommended from experienced drivers: Hertz 4×4 Morocco, Europcar 4×4, local specialists like Dunes & Desert Morocco. Expect to pay more than tourist-level rentals, but you’re getting vehicles actually equipped for desert work.
For detailed rental guidance and comparison, check our complete Morocco car rental guide.
Insurance and Legal Considerations
Standard rental car insurance typically excludes off-road driving. Read your contract carefully. You need comprehensive coverage (collision damage waiver), third-party liability (legally required in Morocco), off-road driving coverage (explicitly stated), theft protection, and glass and tire coverage (often excluded, but negotiable).
International Driving Permit required along with your national license. Easy to obtain from AAA or equivalent in your country for about $20. Takes 15 minutes. Don’t skip this – police in remote areas sometimes check.
Morocco traffic laws and insurance requirements are detailed in our driving regulations guide.
Solo vs. Convoy: The Safety Question
Solo desert driving is significantly riskier than traveling with at least one companion vehicle. If you get seriously stuck or have a breakdown, the second vehicle can extract you or go for help while someone stays with the stuck vehicle.
That said, I’ve done solo trips. It’s not reckless if you stick to more-traveled routes (Marrakech-Merzouga, for example), have proper communication (satellite messenger), inform someone of detailed plans and check-in schedule, are conservative about route choices, and carry comprehensive emergency equipment.
For serious desert exploration, especially routes like Erg Chigaga or western circuits, I strongly recommend traveling with at least one other vehicle. The peace of mind and practical safety advantages are worth coordinating with others.
Final Thoughts: Respect, Preparation, and Perspective
After everything I’ve written here, the real secret to successful desert driving Morocco comes down to one word: respect.
Respect for the desert’s power to challenge even experienced drivers. Respect for the knowledge of local guides who’ve been navigating these routes for generations. Respect for the equipment and preparation that keeps you safe. Respect for your own limitations and knowing when to turn back.
The Moroccan Sahara rewards preparation. Every hour spent learning proper techniques, every dirham spent on quality equipment, every extra liter of water carried – these investments pay dividends in safety, enjoyment, and successful journeys.
But they don’t guarantee success. The desert always has the final say. I’ve seen perfectly prepared expeditions encounter unexpected problems. I’ve seen minimal preparations somehow work out through luck. The goal isn’t perfection. It’s maximizing your odds while staying humble about what you can and can’t control.
For me, the draw of autonomous desert driving in Morocco isn’t about conquest or checking boxes. It’s about the profound silence of the deep Sahara at dawn. The way evening light transforms dunes into something otherworldly. The satisfaction of successfully navigating a challenging section through technique rather than luck. The conversations with Berber nomads at remote wells who’ve lived their entire lives in the environment you’re just visiting.
Start with easier routes. Build your skills and confidence gradually. Don’t let Instagram highlight reels convince you to attempt routes beyond your experience. The desert has been here for millions of years and will remain long after we’re gone. There’s no rush.
And when you finally park your Land Cruiser at sunset on a dune overlooking an empty erg, engine ticking as it cools, nothing but sand to the horizon in every direction, you’ll understand why some of us keep coming back despite the challenges.
The desert doesn’t give itself easily. That’s precisely why it’s worth the effort.
For more routes, logistics, and practical planning information, explore our comprehensive guides at Morocco Travel Trip, including detailed Morocco road trip routes and planning resources.
Stay safe out there. See you in the dunes.